After a first article about the gear I use for aviation photography, I thought I’d give you a look into the process behind my image editing. Although in my opinion a good photo will mostly depend on how well the shoot went, editing can often play an important role in either pushing a good image to the top, or in some rare cases, saving a rare but imperfect photo.
First things first : getting good photos to edit
I think the best editing is the one you don’t do. I don’t mean this in the sense that editing is bad. But the better the original image, the less editing there is to do. More often than not, an image’s fate is mostly sealed during its creation.
It might sound obvious, but a good picture comes down to three main factors :
- Light
- Position in regard to subject
- Equipment : Gear, settings and skill
Usually, the best light occurs between one to two hours after sunrise and before sunset. For light, the best time window can vary between the seasons and depend on humidity. In some cases of runway orientations, light might not even get to the desired side of the runway at all in winter.
Below is an example of good lighting. Using suncalc, you can see the light direction at any time of the year (represented by the orange line) in any place in the world. Here, I can see that for runway 23 operation, the sun will get to desired side of the runway after about 4 pm, and will stay at a good angle in relation to the aircraft until sunset. In that time window, it will be what could be considered the perfect light angle – about 30-50 degrees from the front of the aircraft.
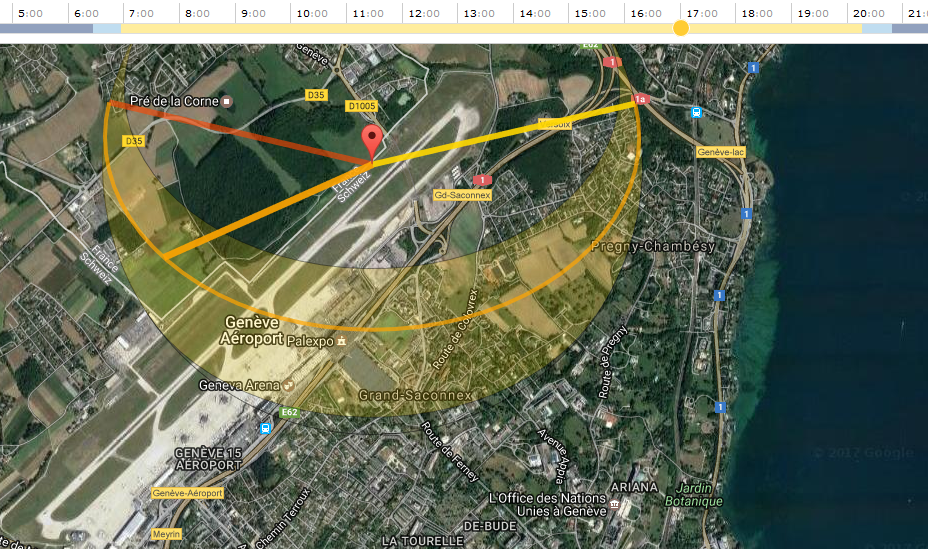
If runway 05 was in use, shooting landings would be best from sunrise until about 10 am, but from the opposite side of the airport.
Does it mean it’s impossible to take good pictures in the middle of the day? It all depends on the aesthetic you’re after. Personally, I can’t recall a favourite picture that I’ve taken around midday. But that doesn’t mean I stop taking photos outside of “opening hours”.
And of course, there are many exceptions, especially for backlit images that can produce powerful light effects, panning in cloudy weather or after sunset, night shots, etc..
Pre-editing raw in Photoshop
I started editing with Paint Shop Pro more than ten years ago but quickly moved to Photoshop, which I still use today. 99% of the time, I shoot in RAW format, which gives a lot more editing possibilities compared to jpeg.
Exposure
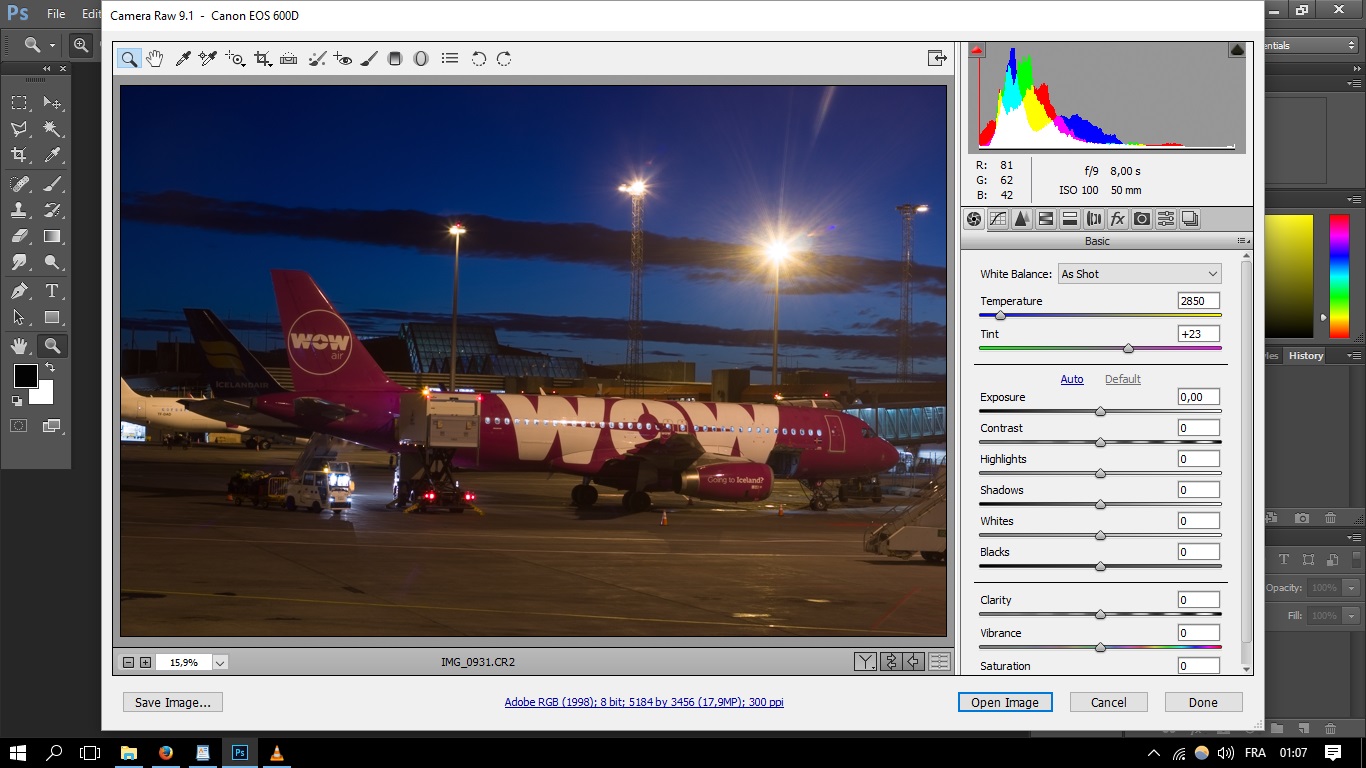
When I open an image in the built-in raw editor, the first thing I do is get the exposure right as close as possible. It’s important to do it in raw, because later we’ll be editing a raster, which doesn’t contain as much information.
Contrast
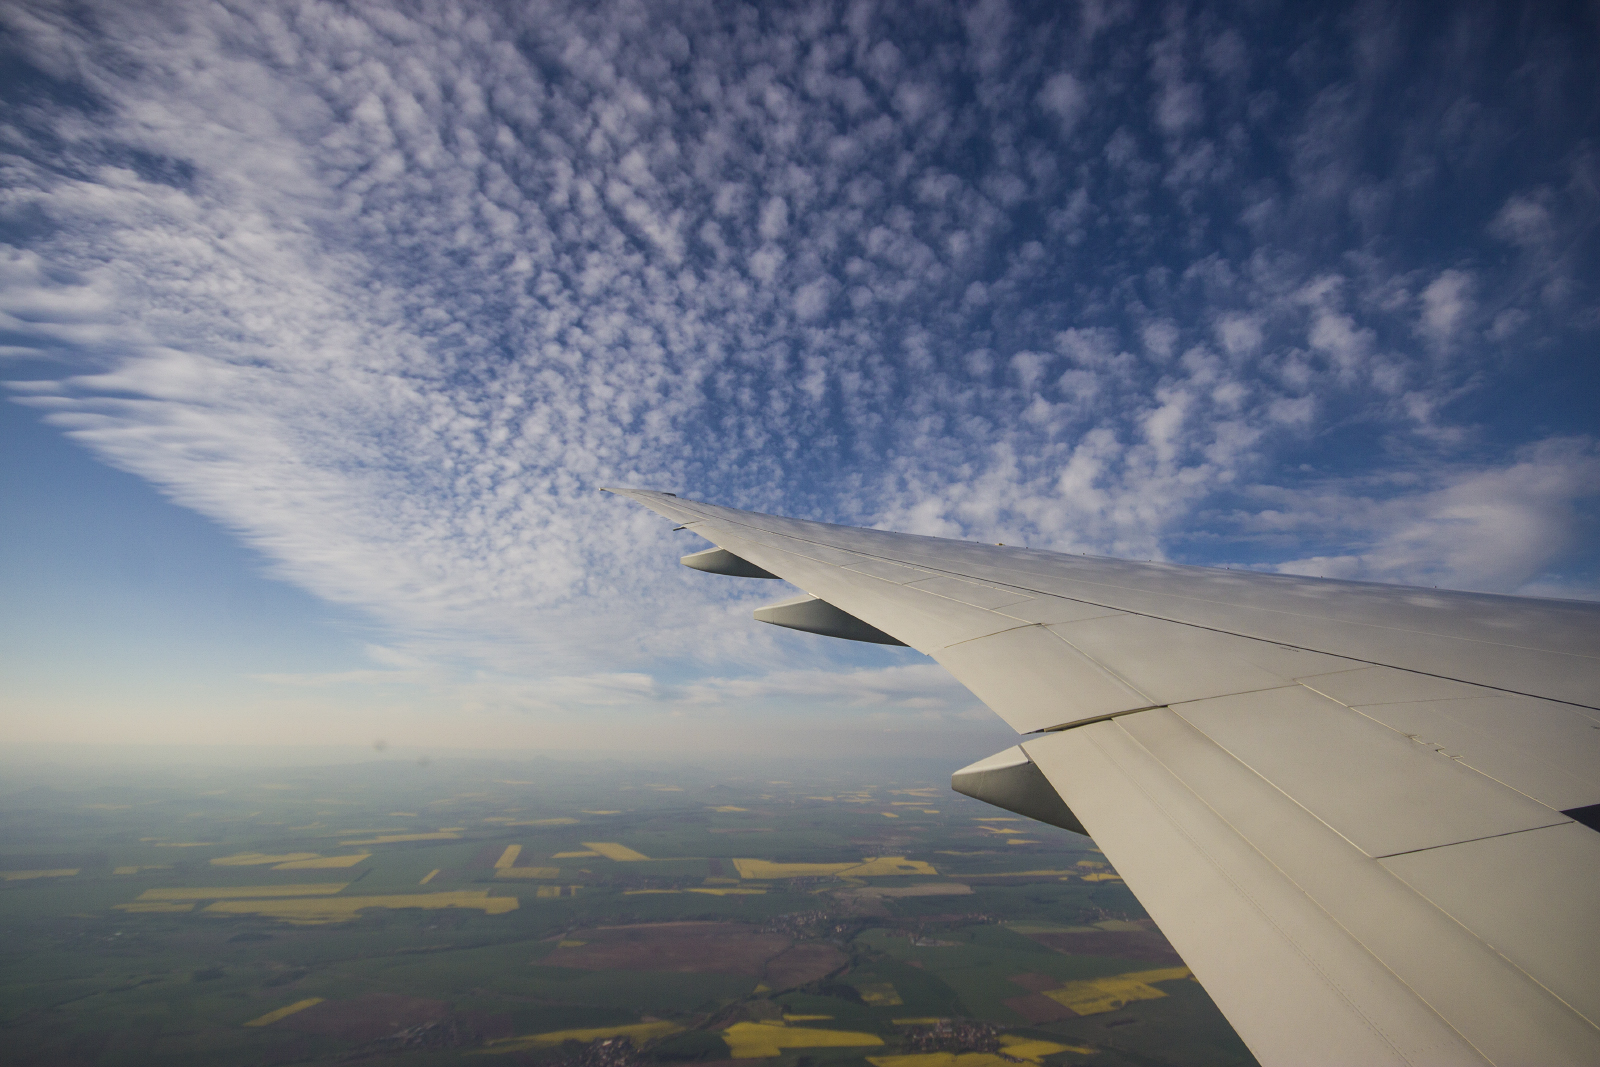
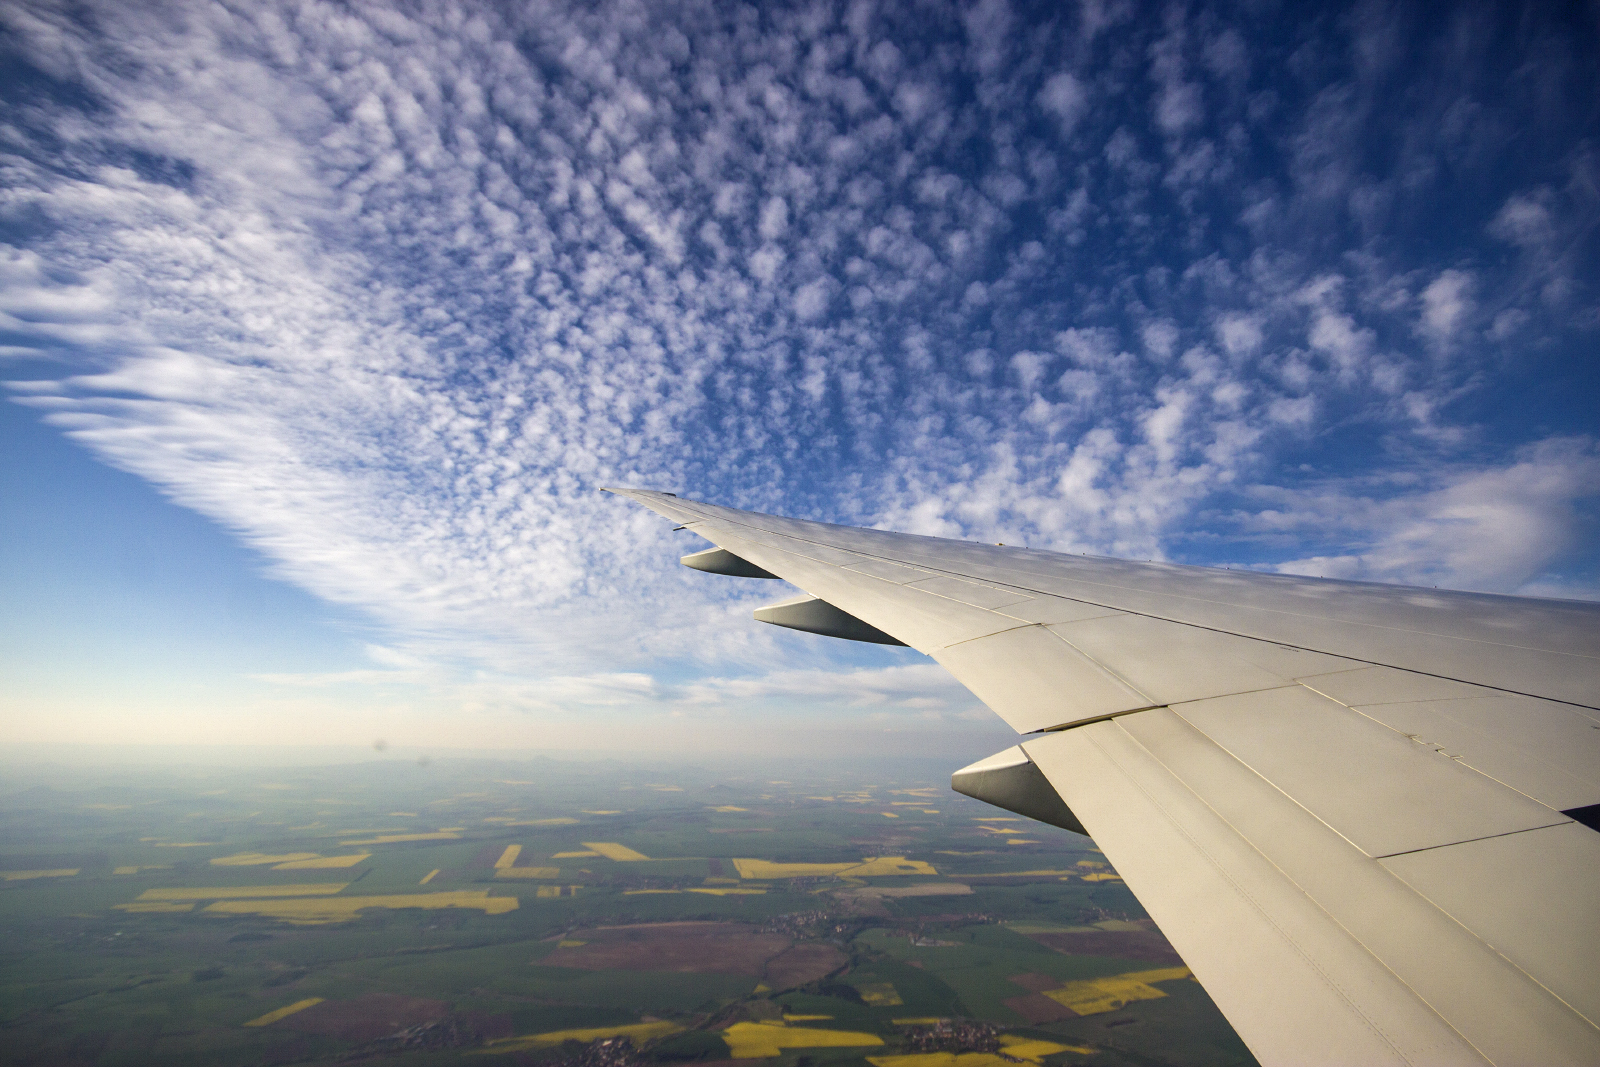
Here’s a first example of an image that didn’t require any major editing, just adding a bit of contrast and clarity to make the details pop. The change is subtle, yet makes a big difference:
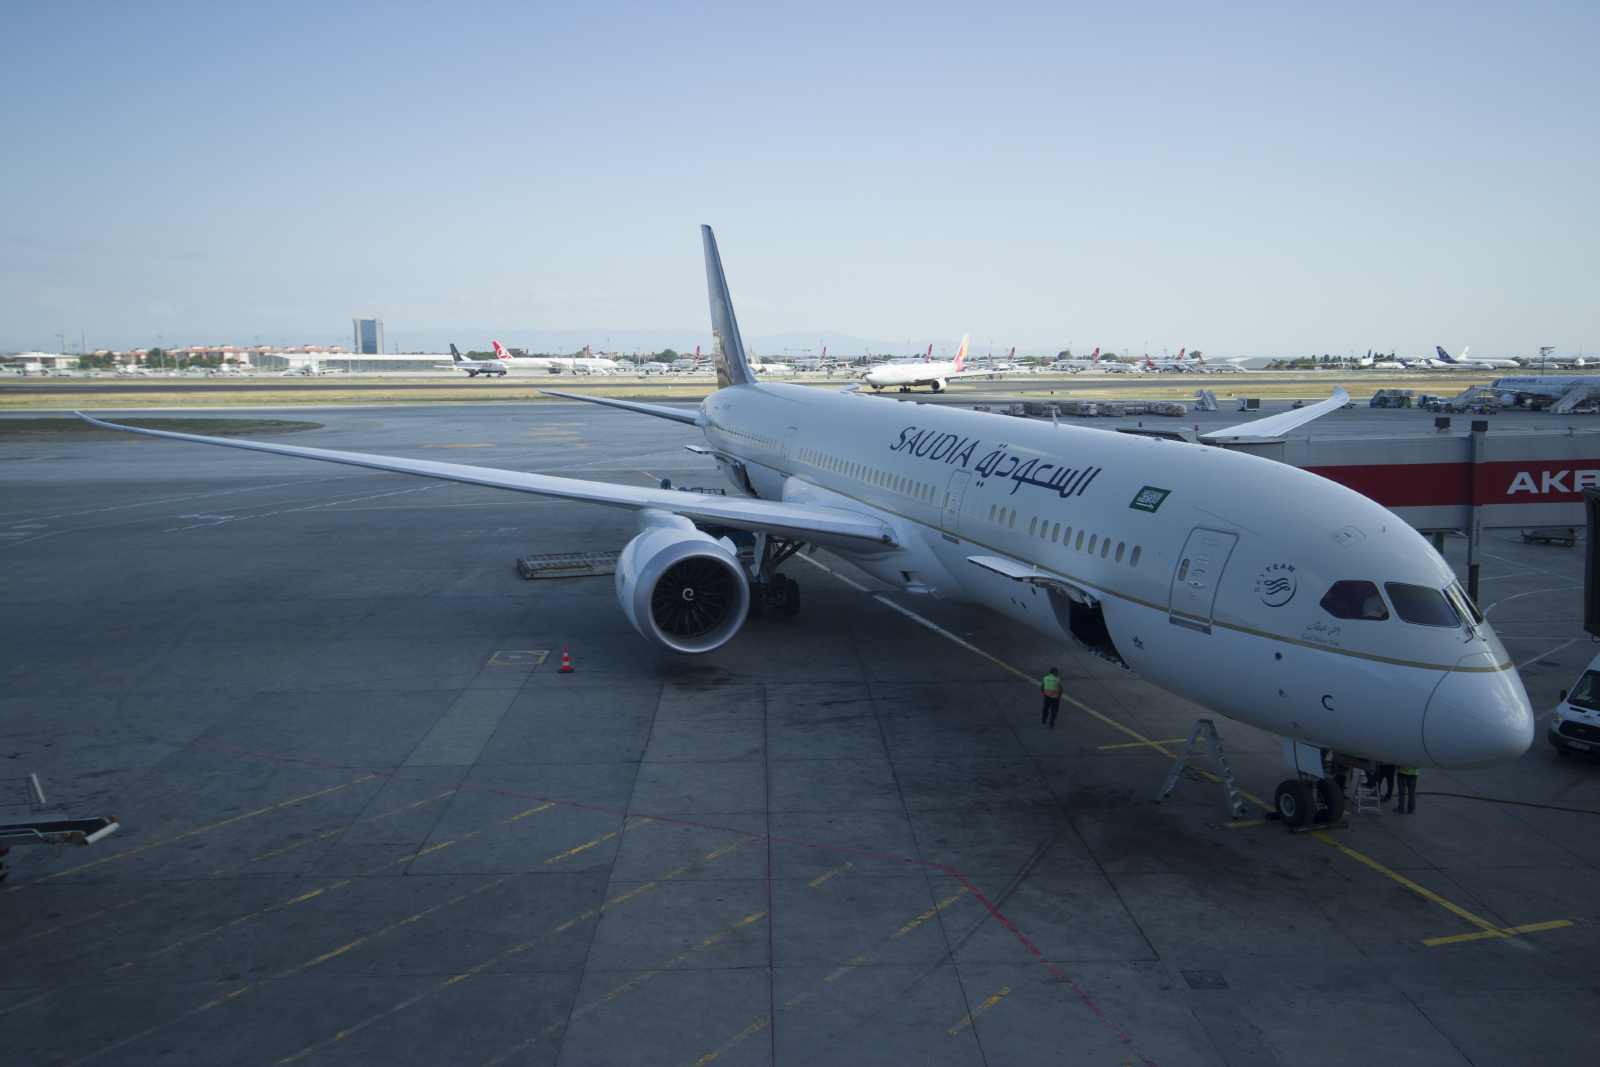
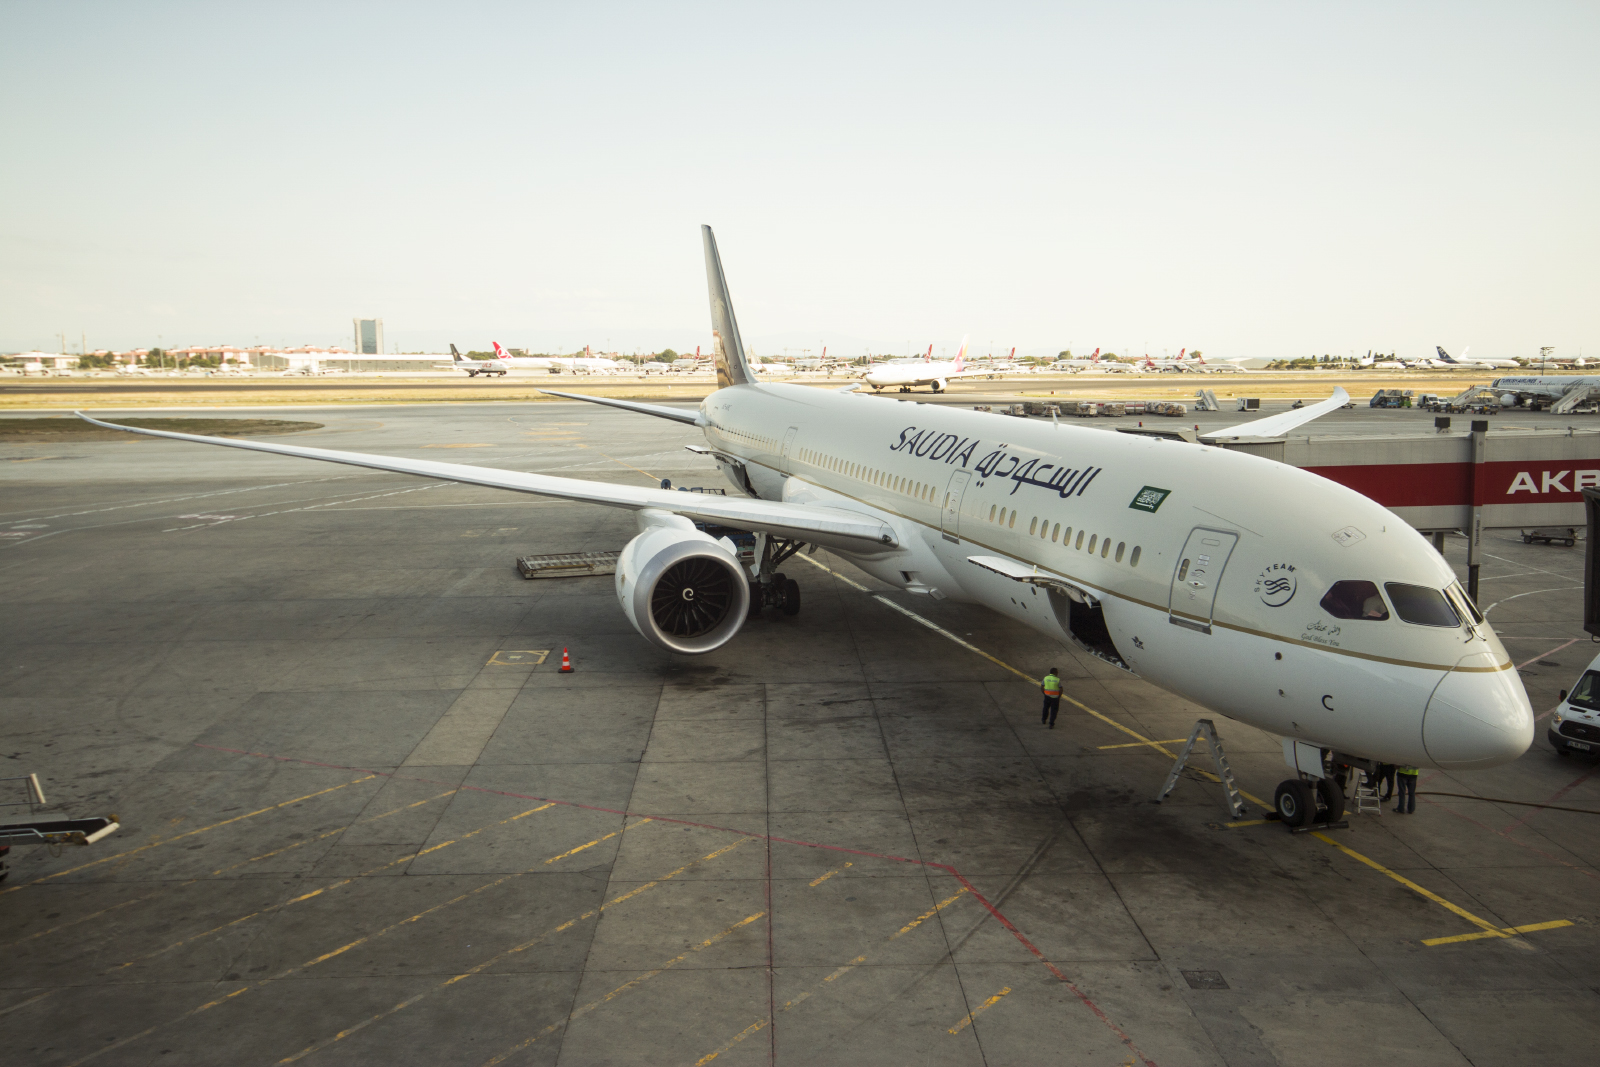
The next example took quite a bit more editing to fix the exposure, the effects of shooting through a window and the overall lack of contrast:
Shadows and highlights
Next I add some contrast and recover some shadows when necessary, especially if the underside of the aircraft, engines and landing gear need some more light. I don’t usually lower the highlights or whites, and instead use the exposure selector to fine tune the overall exposure. If there are some blown out spots and I can’t balance the global exposure while keeping the whole image correctly exposed, then the image itself might not be worth editing at all.
Clarity
One setting I like to use, on a case by case basis, is clarity, which adds midtone clarity. It can be a good way to add some contrast, get rid of a veil and make the colors more vivid, also making the overall image sharper, without actually sharpening.
Saturation
Adjusting saturation can also be useful in two cases. There are two ways to do this, either using saturation or vibrance. Compared to the saturation tool, vibrance will only add saturation where low saturation is detected.
As an example, the next image was taken right after noon, and although the light is not good, the overall image still retains some subject-related appeal. Use the slider to see the before and after.
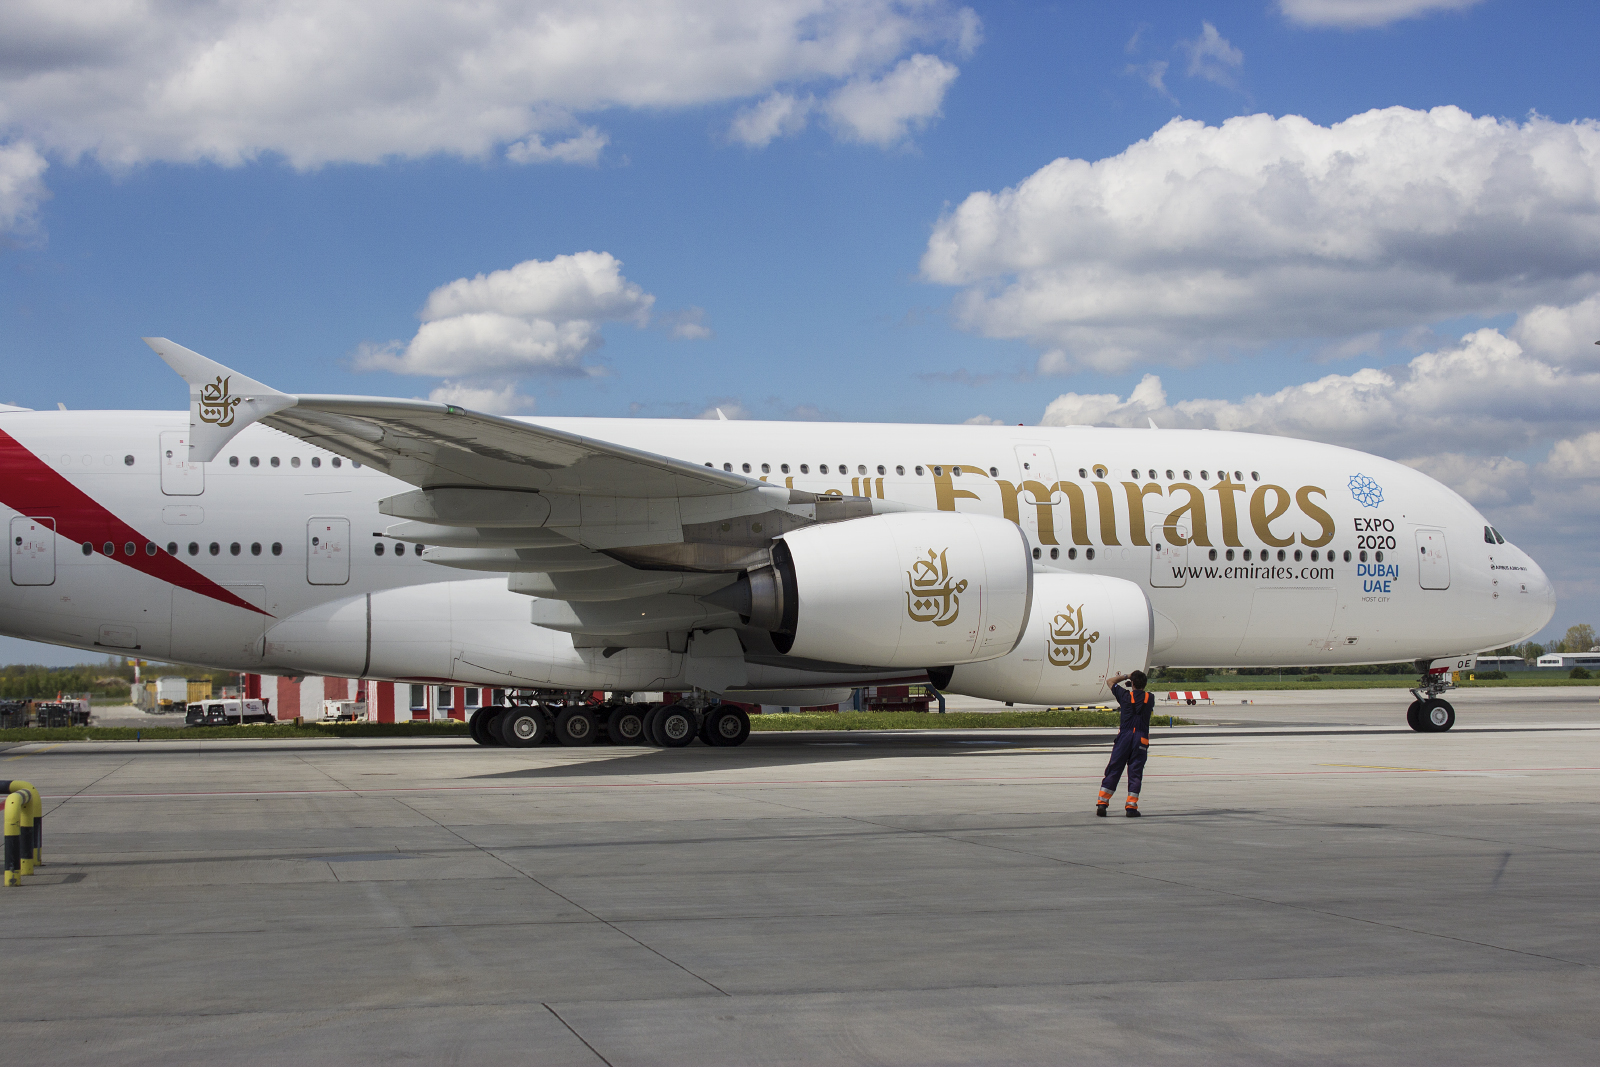
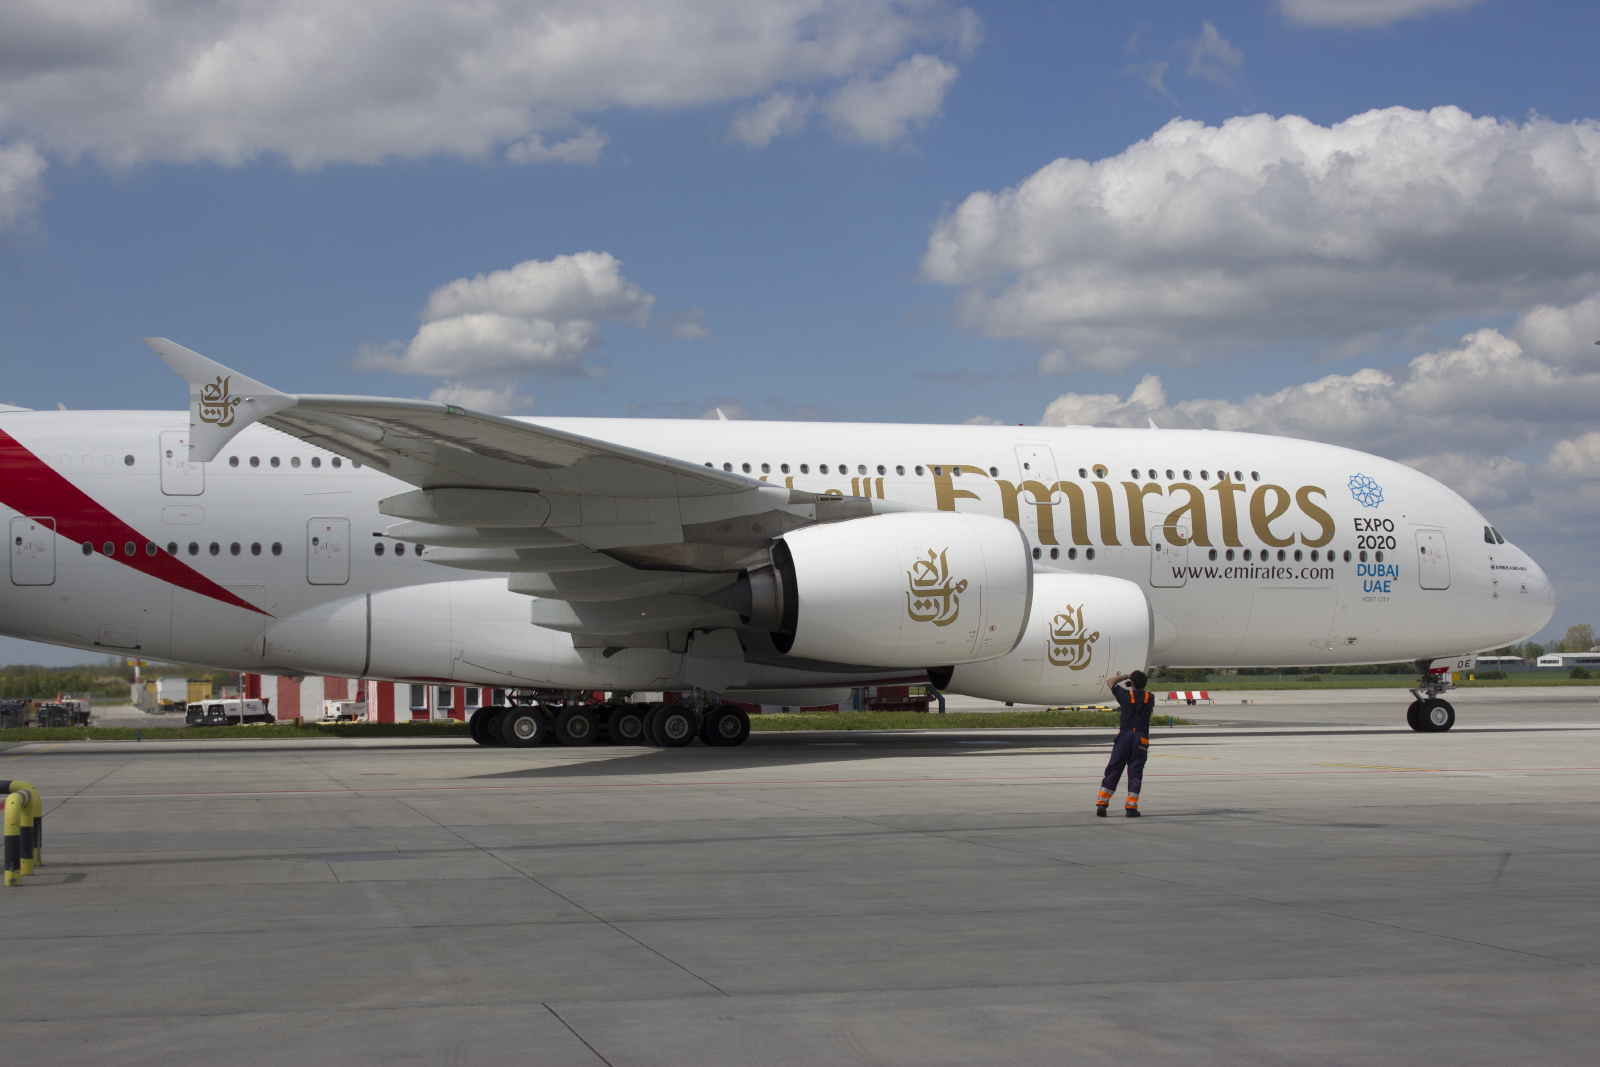
It’s interesting to note that every image will require different amounts of saturation tweaking. Sometimes, I will use the maximum vibrance possible, and some other time, only a tiny adjustment will make a big difference.
Leveling out
I also level the image out, (usually in the raw editor since there is a convenient grid to help with the eyeballing. Once I’m satisfied with the raw editor tweaks, it’s time to get on with the finer editing.
Final visual touches before resizing
Retouching
Most of the time, I do not alter the image itself a lot, I limit myself with getting rid of dust spots. On some images, I will touch up a few annoying elements such as bits of fencing or lighting poles, if they get into the way too much.
Cropping
I do the biggest part of the editing before resizing, but after cropping. Cropping is the first thing I do, and sometimes it takes me multiple tries. I use the dedicated crop tool and simple select tool + crop set at 3:2 ratio. There are no rules here, and I find re-composing an image to be one of the more difficult parts of photography. I usually try to stay away from a centered subject, both horizontally and vertically, and give the planes some breathing space on zoomed in images. When the plane is just part of the scenery, it’s easier to balance things out.
Almost done : resizing
Now resizing is a subject on its own, but I’ll try to quickly explain how I do it. There are 3 main reduction algorithms worth mentioning: Bilinear, Bicubic and Nearest Neighbour. Both produce a very different result.
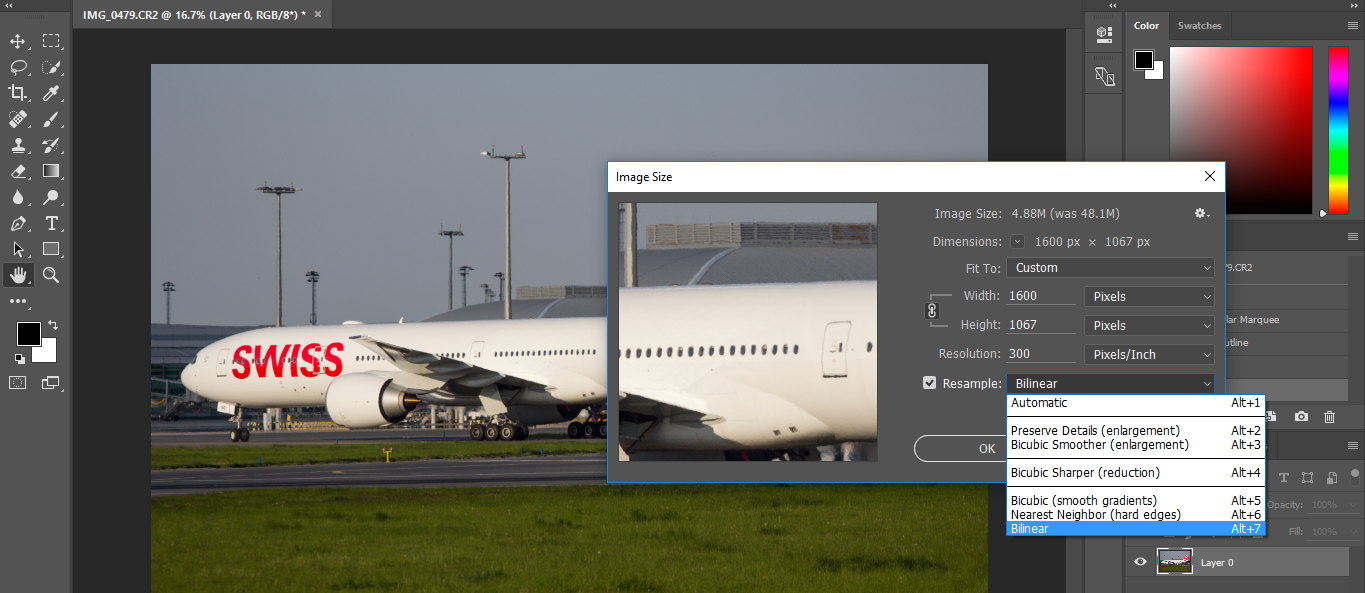
Here’s a comparison of the different algorithms:
Bilinear VS Nearest Neighbour
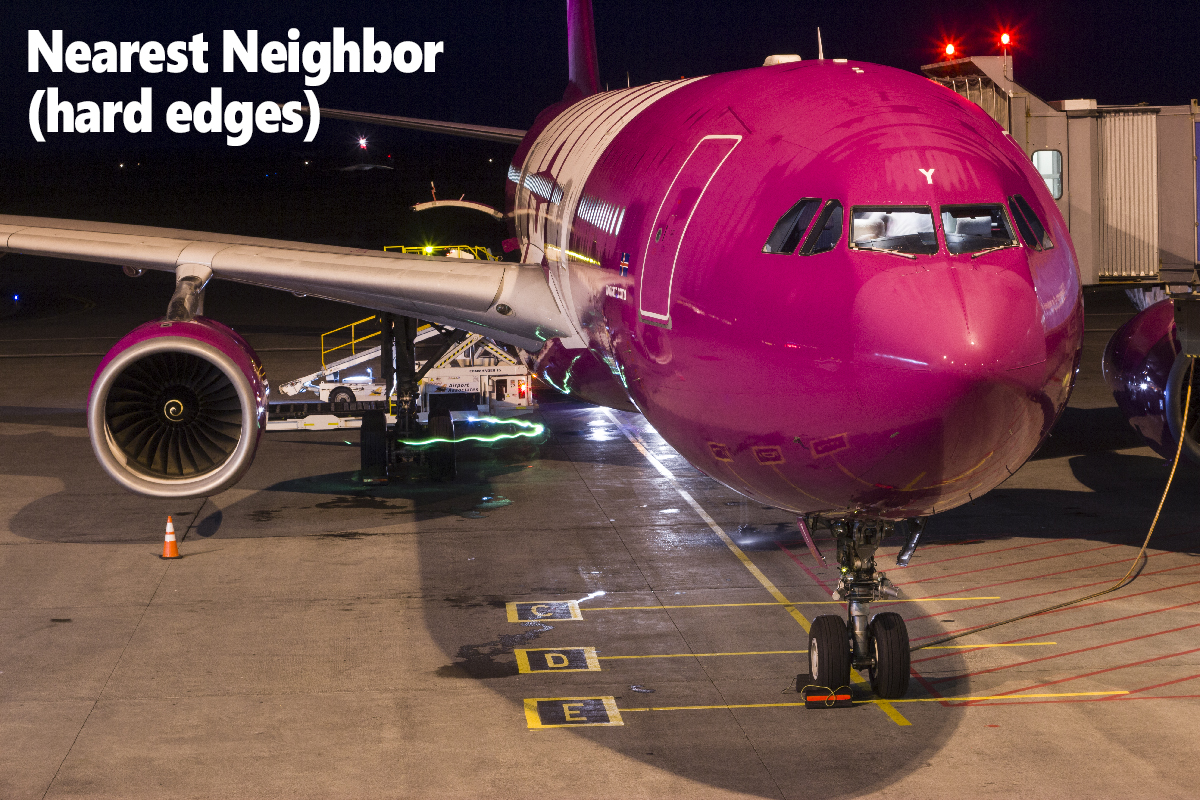
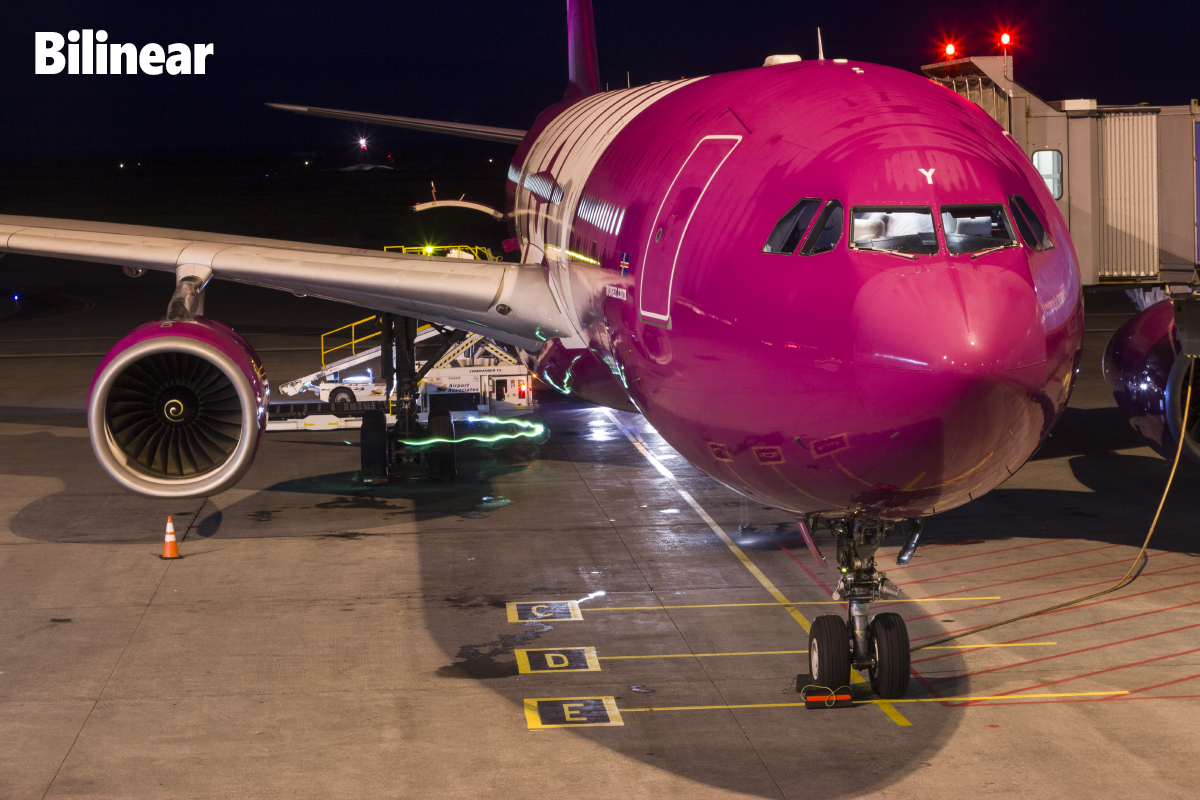
Although the Nearest neighbour algorithm looks sharper at first sight, on a closer look there it adds quite a bit of noise and aliasing, and doesn’t allow for much sharpening later on.
Bilinear versur Bicubic sharper
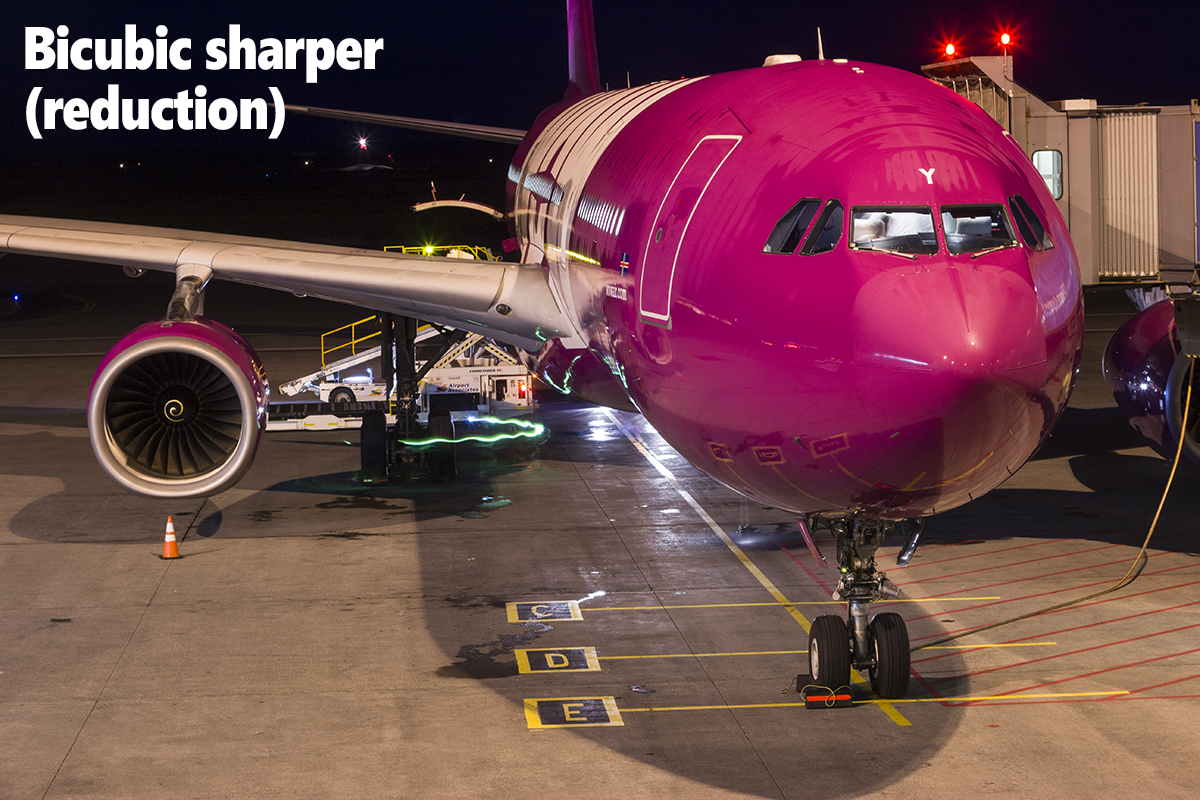
Again, at first sight, it might seem that the bicubic is sharper. On closer scrutiny (right click + display image), it is obvious that something undesirable has happened, a combination of overall blur, exaggerated white edges and overexposure of the highlights.
I only use Bilinear, because it’s the only one (as well as Bicubic – smooth gradients) that preserves the details and gives the best fidelity. I also creates a solid, unaltered resized image that I can sharpen later.
The main objective when resizing is to keep as much detail as possible without altering the look of the image, even if it doesn’t look as sharp as it could be. This will be taken care of in the next step.
Sharpening: smart sharpen and unsharp mask
Finally, for sharpening, I use various techniques. I think it is one of the most sensitive parts of editing, as it can difficult to judge depending on the screen dpi, and just generally, it is harder to reach a consensus between photographers. In my opinion, too much sharpening can pretty much ruin an image, if combined with a wrong resizing algorithm. In comparison, an unsharp image is not as bad in my opinion, if the original one was focused properly and has no unwanted blur.
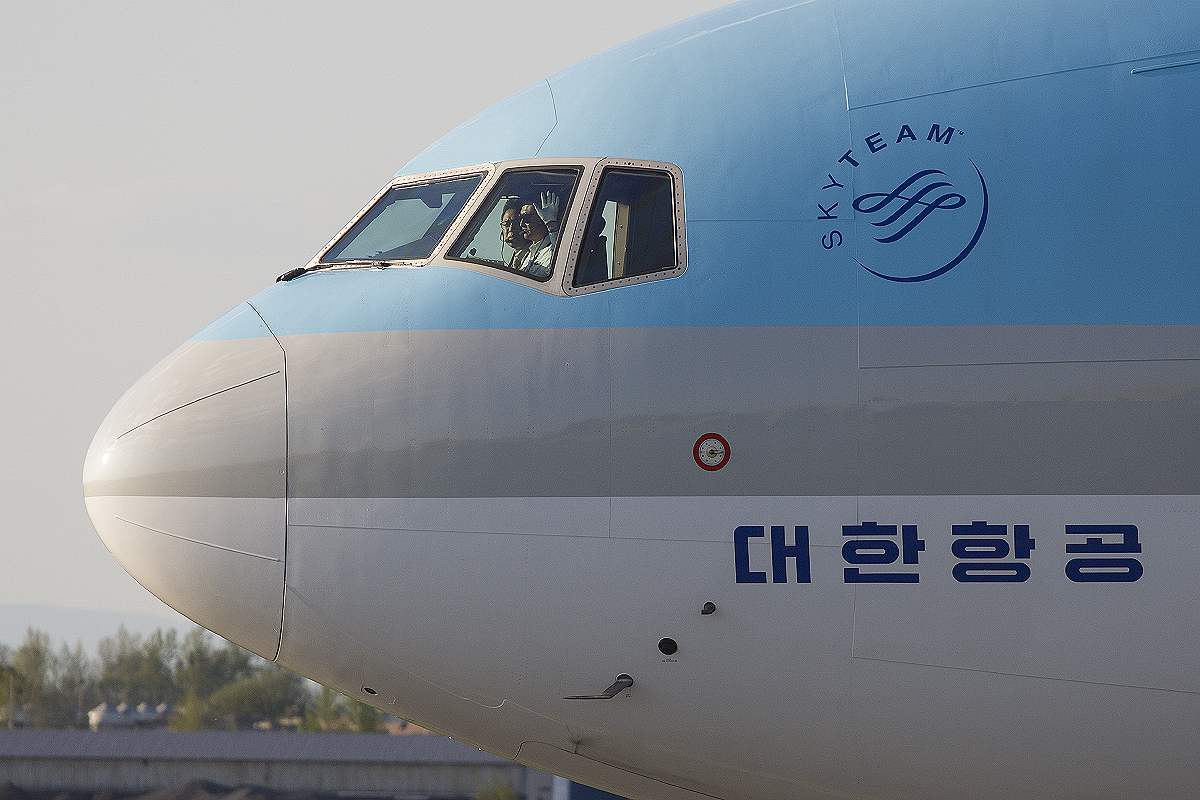
As you can see next, the image on the right has been sharpened too much, and you can see the exaggerated white edges which give the image an unpleasant look.

Sharpening techniques will vary depending on the final output size. The different sharpening algorithms will not have the same effect if editing for 1600*1200 or full size. For full size images, it usually takes a bit more sharpening, as the details and grain is not the same size.
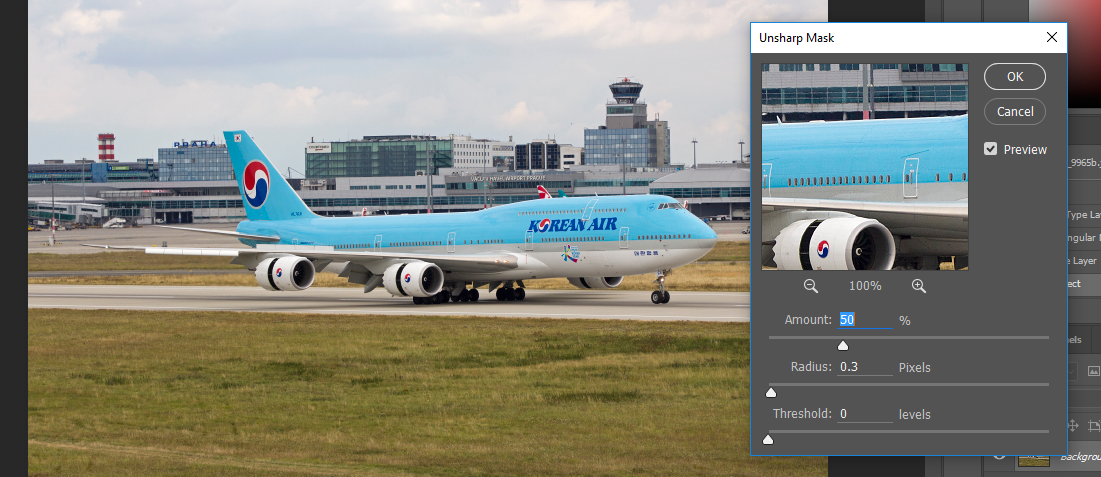
I usually edit my images for a final output of 1200 to 1600 wide, sometimes 1920. The following techniques work well for these sizes. After resizing the image using the bilinear re-sampling, I will use one of the following two sharpening effects, Smart sharpening or Unsharp mask. I set both so that the effect is pretty low, almost unnoticeable. That way, I can repeatedly apply it and fine tune the effect until i am satisfied, and quickly cycle through the various levels of sharpening to pick the best one.
My Unsharp mask settings: amount – 50%, Radius – 0.3 – 0.5, Threshold 0
I think it’s up for debate whether it is best to sharpen before or after resizing. It seems to me that since detail is being lost in the resizing process, it makes more sense to sharpen the downsized image with the appropriate sharpening effect.
Another important thing is using selective sharpening. Sharpening can add quite a bit of noise to an image. Therefore, if an image has already some noise, it is good to use the lasso or other selection tool to isolate the aircraft and sharpen it separately.
It is also not always desirable to sharpen every part of an image, especially for panning, where the objective is to get the least amount of sharp detail possible in the background.
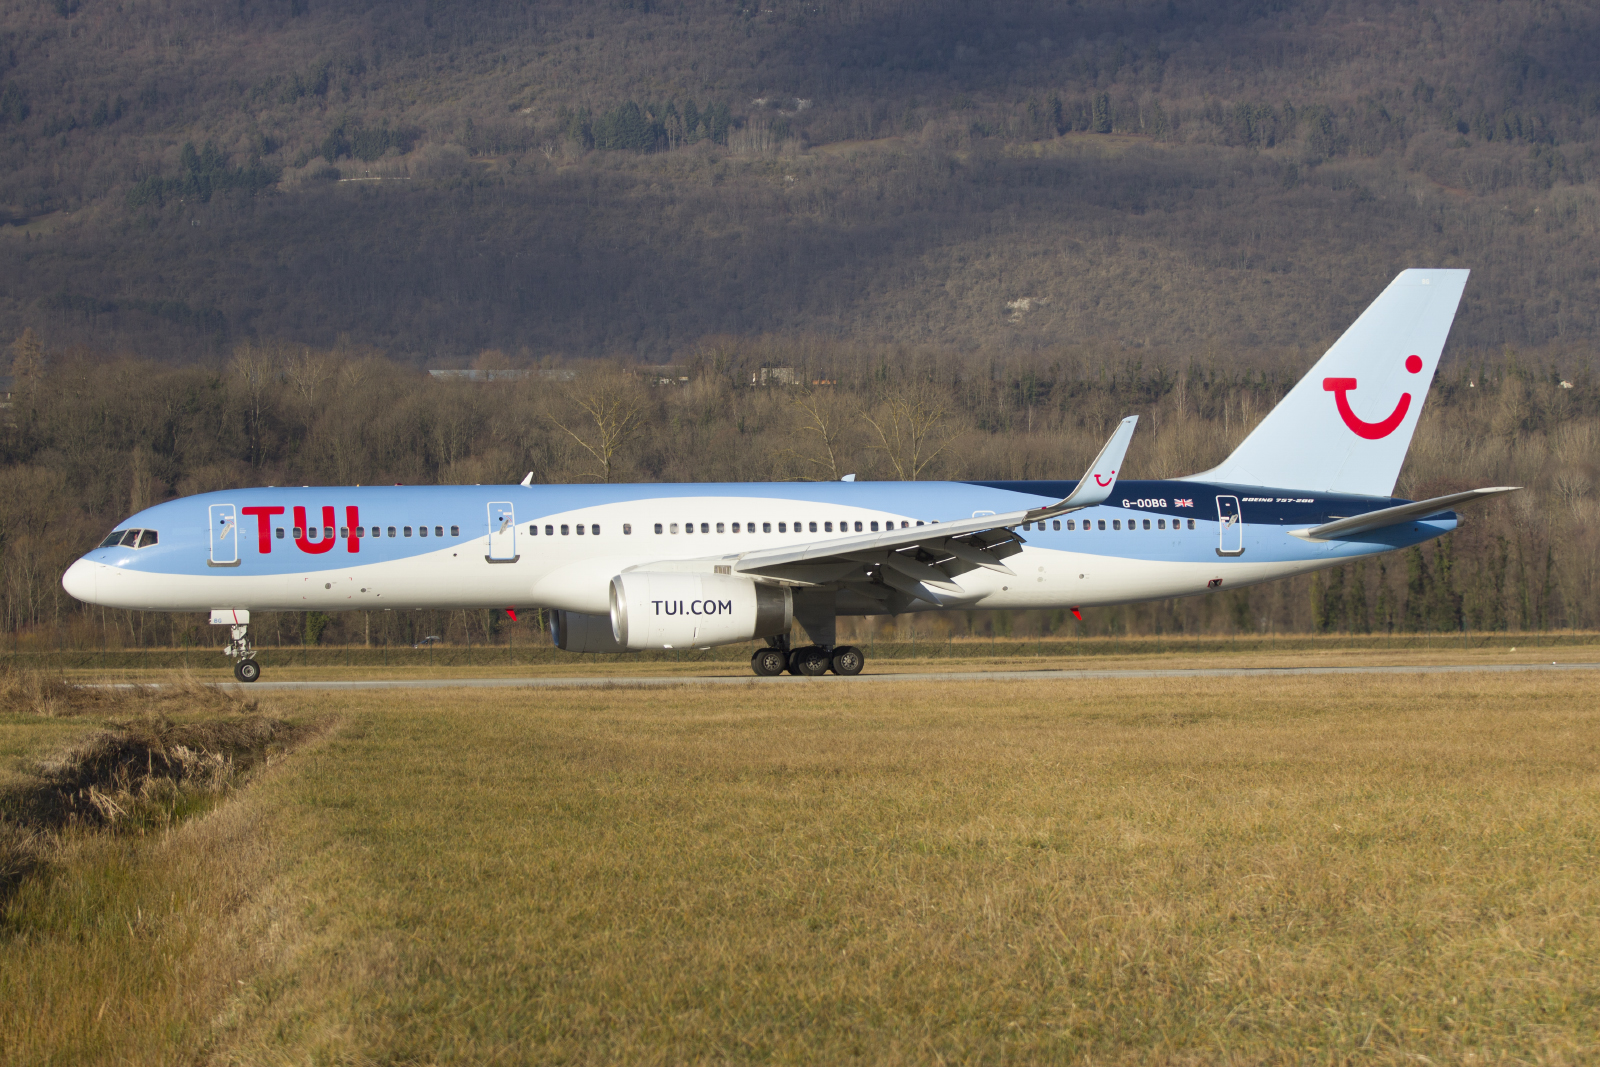
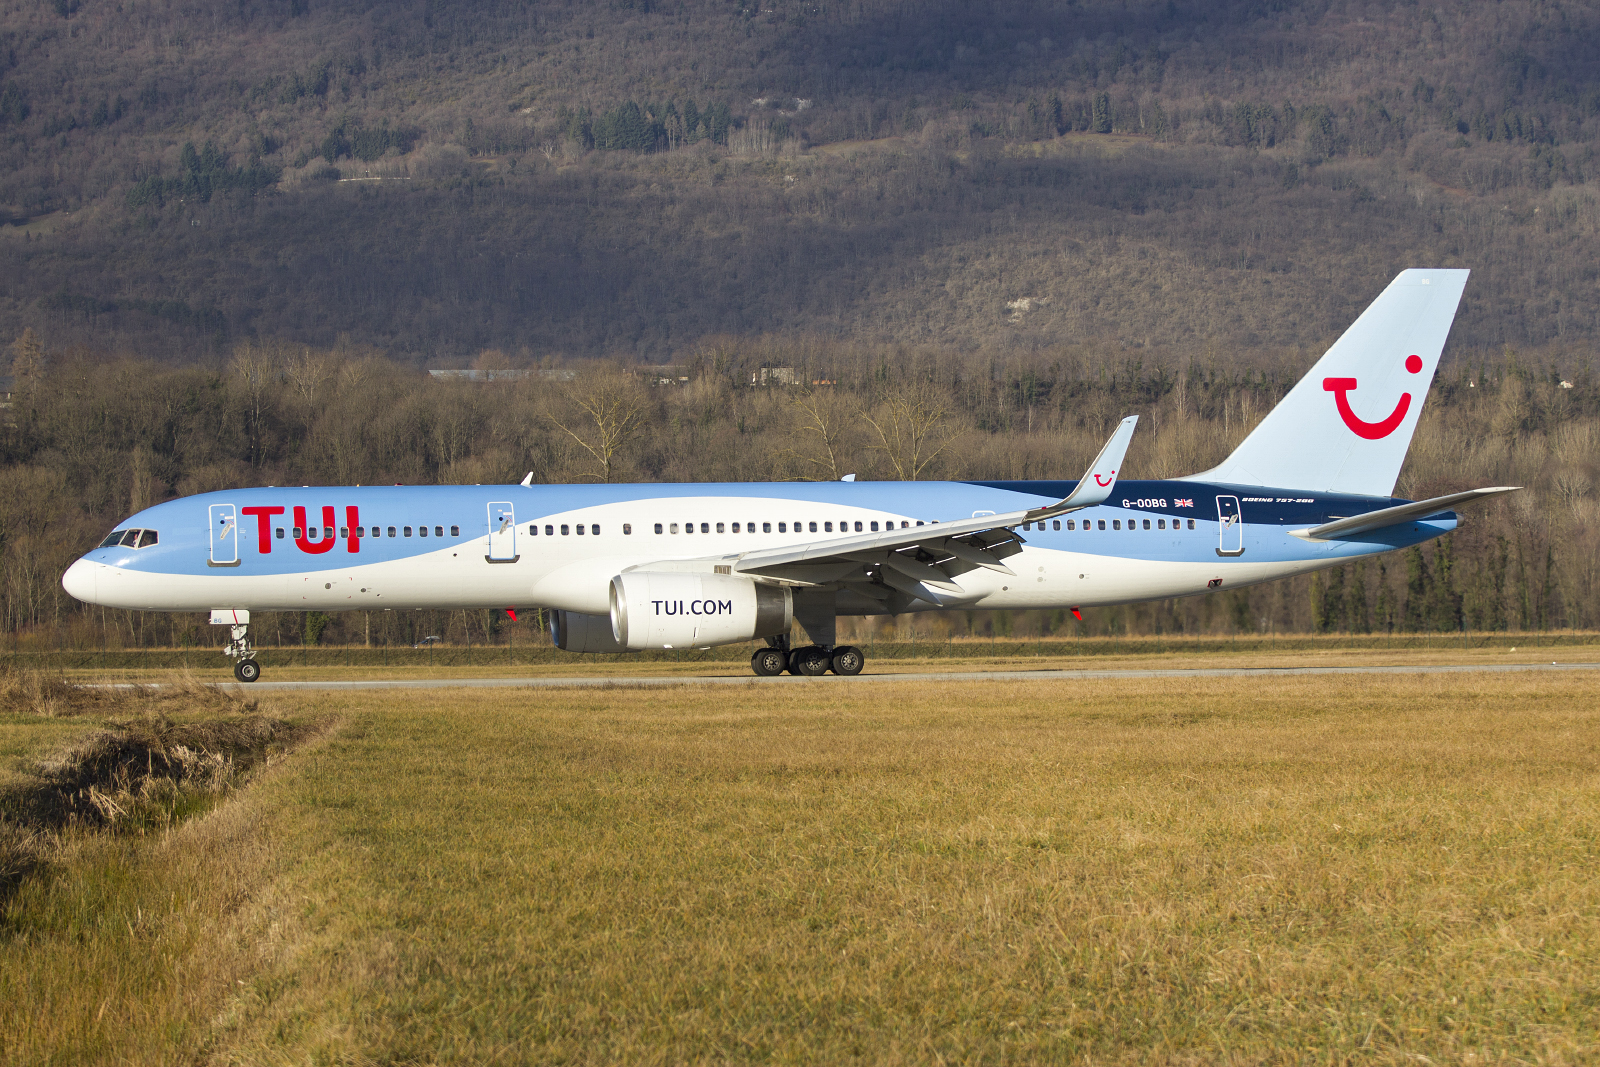
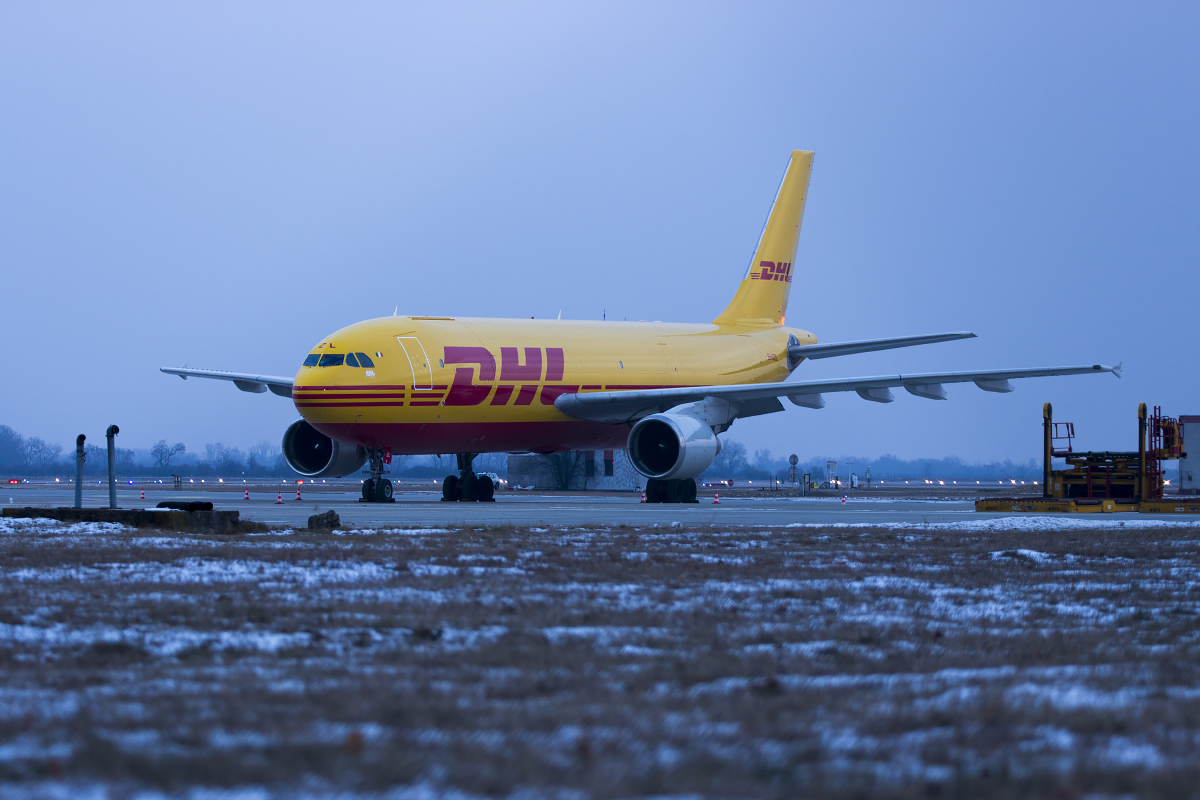
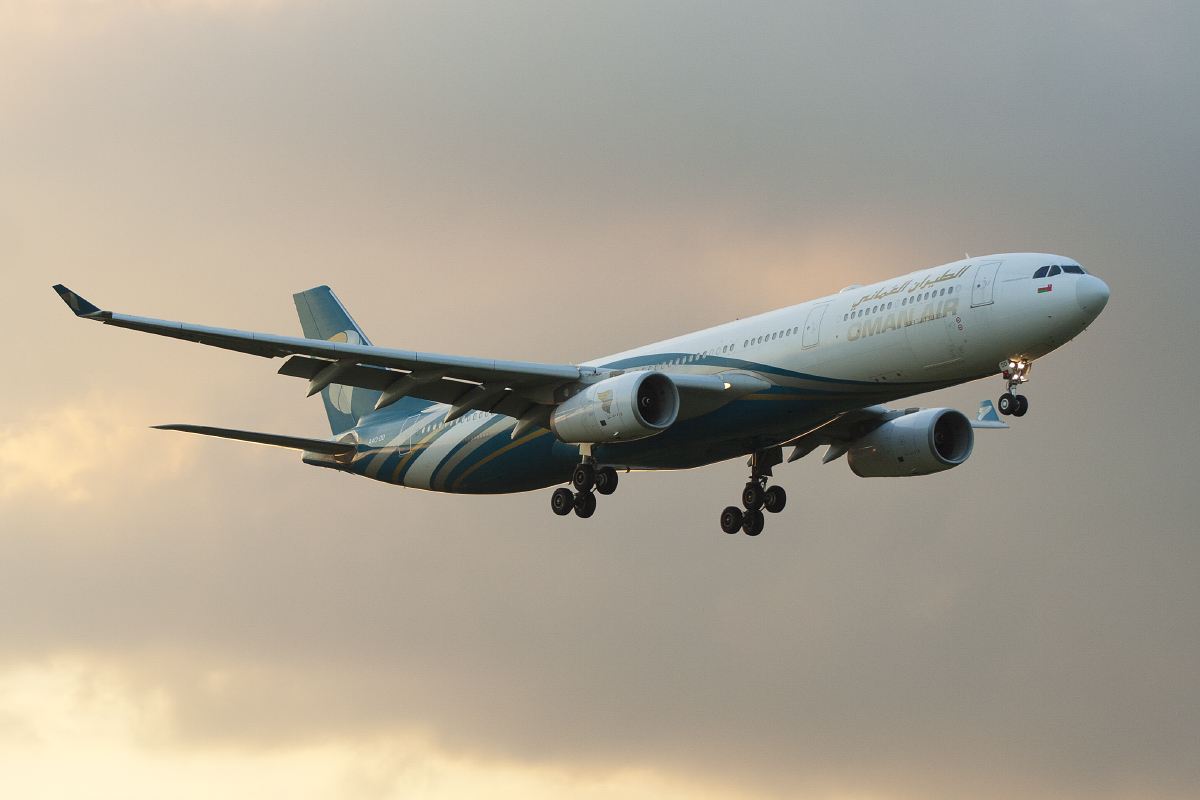
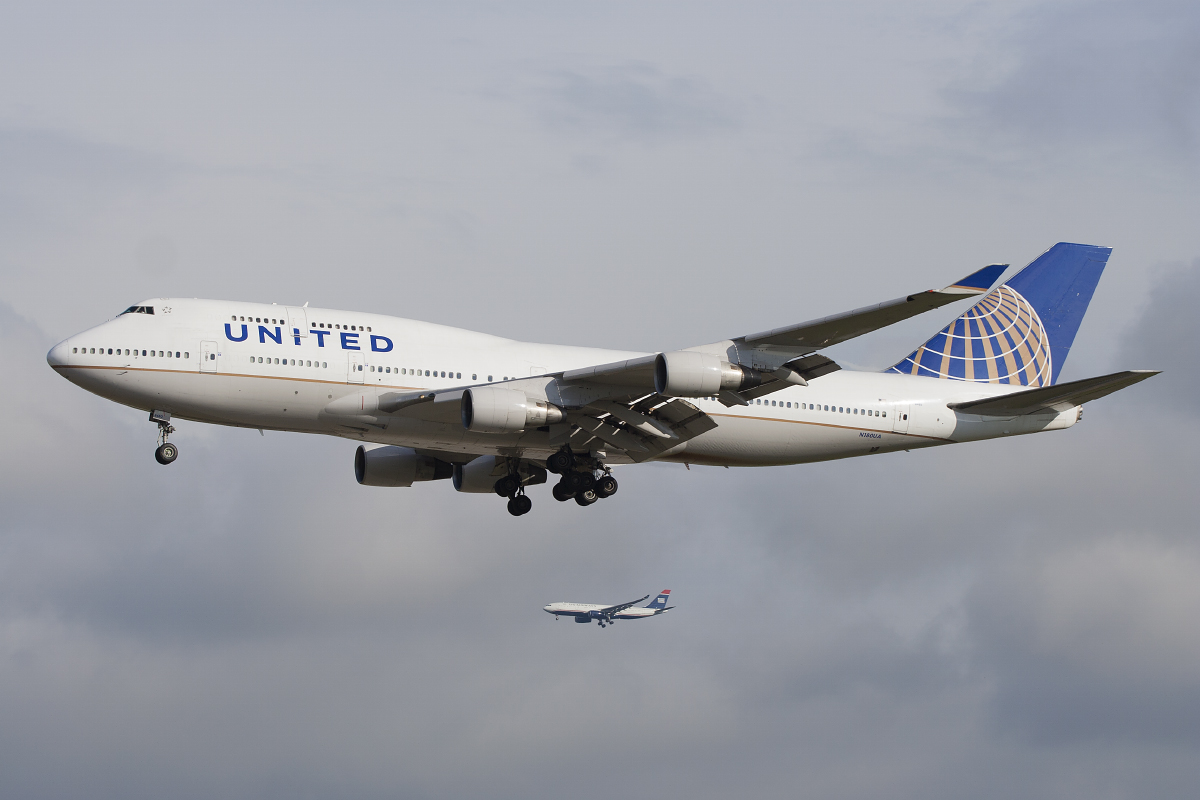
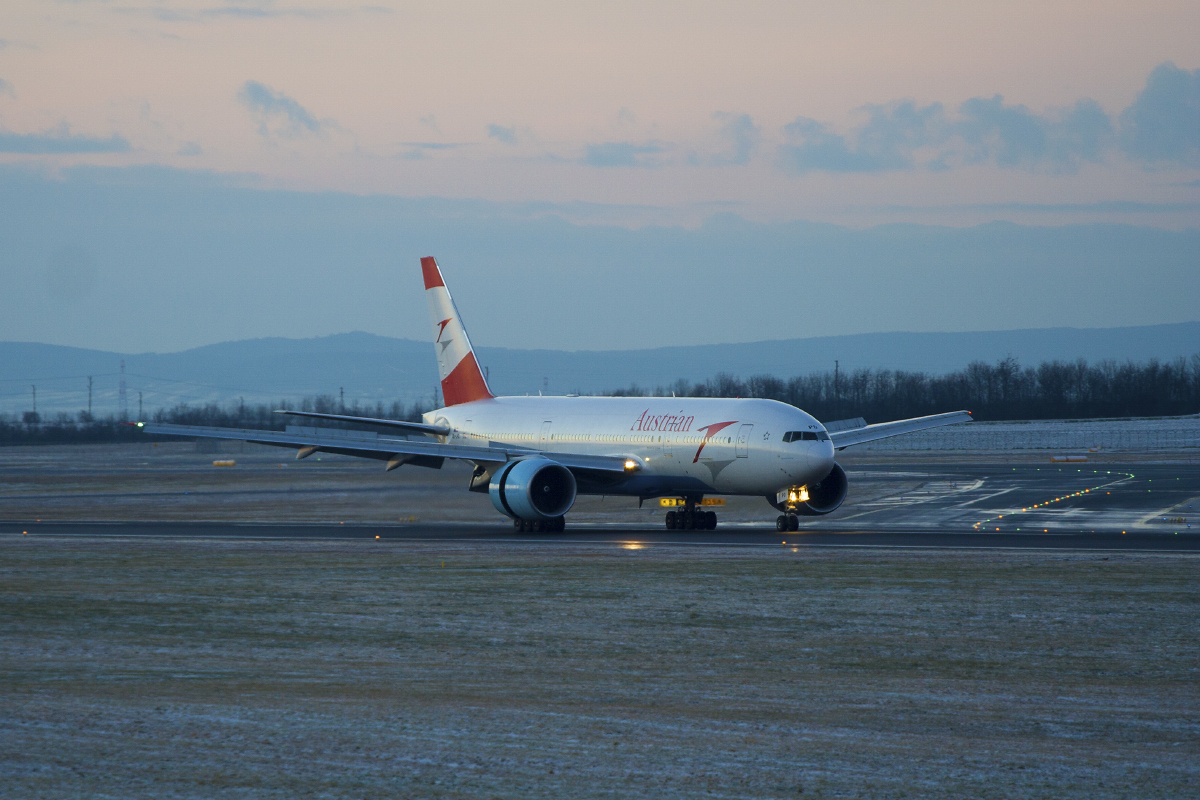
A few edited images
Here are few images to illustrate some final edits.

I hope you enjoyed this look behind the scenes! I’m curious, what resizing algorithm do you use, and how do you sharpen your images?
Til next time!
Thank you!!!! So much